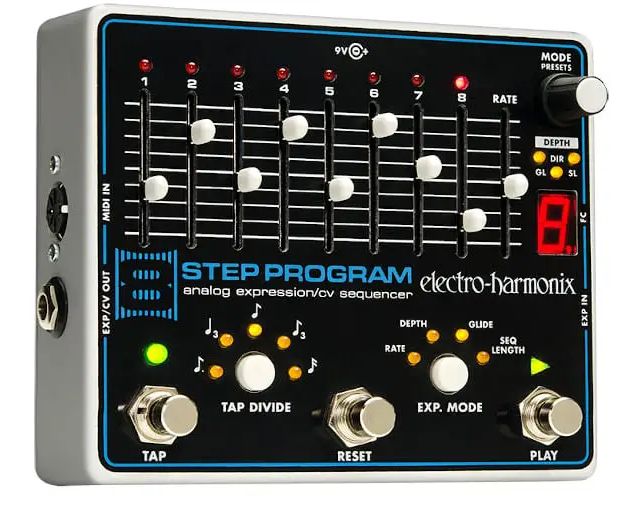
Changing the 8-STEP’s MIDI Channel
1. Press and hold the RESET FSW. After 3 seconds you will see the GL
   and SL LEDs blink, while the DIR LED is off. At this point the
   current MIDI channel is displayed on the digit display.

2. While continuing to hold down the RESET FSW, turn the MODE knob
   clockwise to increment the MIDI channel and counter-clockwise to
   decrement the MIDI channel.

3. The range of available channels is 1 through 16 plus a setting
   displayed as A where all MIDI channels are recognized. Since there
   is only one digit available on the display, the digit’s decimal
   LED
   lights up to indicate the tens placeholder. So Channel 12 is shown
   by displaying the number 2 plus the decimal LED: (2.).
   Channel 2 would be shown by displaying only the number 2 (2).

4. To enable all MIDI channels, turn MODE clockwise past Channel 16.
   An A will be displayed on the digit, now all MIDI channels are
   recognized.

5. Once you have selected your chosen MIDI channel, release the
   RESET FSW. The MIDI channel selection remains in memory even after
   power cycling.

6. The MIDI channel is a global parameter; it is not saved with
   presets.

LOADING PRESET WITH MIDI
Using Program Change Messages
The 8-STEP accepts MIDI Program Change messages to load its stored
presets as long as the MIDI controller is set to the 8-STEP’s MIDI
channel. As an example, if you want to load preset 10, send Program
Change message 10 to the 8-STEP.

Using CC Messages
The 8-STEP also loads presets upon receiving MIDI CC 118. The data
value sent along with MIDI CC 118 indicates the preset number that
will be loaded. For example if you want to load preset 51, send a
data value of 51 along with MIDI CC 118. Sending a value above 99
will unload the currently selected preset.

SAVING PRESETS WITH MIDI
1. You can save the 8-STEP’s current setting by sending a MIDI
   message using CC 117.

2. The MIDI controller must be set to the 8-STEP’s current MIDI
   Channel.

3. The data value that is sent along with MIDI CC 117 will be the
   location that the preset is saved in. The 8-STEP overwrites the
   old preset that was at this location.
   For example, if you want to store your settings to preset number
   3, send MIDI CC 117 with a data value equal to 3.

4. The 8-STEP can save up to 100 presets via MIDI (using values 0
   through 99), any data value above 99 will be ignored.

5. When saving presets with MIDI, be careful because the preset
   is saved immediately upon receiving the proper MIDI message.

MIDI CC Messages
CC# PARAMETER     EXPLANATION                    CC DATA RANGE
4   EXPR.PEDAL    Works as expression pedal for  0-127
                  parameter selected by the EXP.
                  MODE LEDs.
16  STEP 1 SLIDER Controls the setting or value  0-127
                  for Step 1’s slider.
17  STEP 2 SLIDER Controls the setting or value  0-127
                  for Step 2’s slider.
18  STEP 3 SLIDER Controls the setting or value  0-127
                  for Step 3’s slider.
19  STEP 4 SLIDER Controls the setting or value  0-127
                  for Step 4’s slider.
20  STEP 5 SLIDER Controls the setting or value  0-127
                  for Step 5’s slider.
21  STEP 6 SLIDER Controls the setting or value  0-127
                  for Step 6’s slider.
22  STEP 7 SLIDER Controls the setting or value  0-127
                  for Step 7’s slider.
23  STEP 8 SLIDER Controls the setting or value  0-127
                  for Step 8’s slider.
24  RATE SLIDER   Controls the RATE slider       0-127
                  thereby controlling the tempo
                  of the sequencer. Sending RATE
                  slider MIDI data is equivalent
                  to moving the RATE slider.
25  GLide         Smoothly controls the GLIDE    0-127
                  parameter over its entire range
26  DIRection     Controls the DIRECTION setting 0=Forward
                                                 1=Reverse
                                                 2=Bounce
                                                 3=Random
27  SEQ. Length   Controls the SEQeuncer LENGTH  1-8
                  setting
28  DEPTH         Smoothly controls the DEPTH    0…100=0% to 100%
                  parameter over its entire      101…127 amplify
                  range                          step values that
                                                 are set below
                                                 step slider
                                                 maximum
29  TAP DIVIDE    Controls the TAP DIVIDE        0=off or 1/4 note
                  setting                        1=dotted 8th
                                                 2=1/4 note triplet
                                                 3=8th note
                                                 4=8th note triplet
                                                 5=16th note
                                                 6=32nd note
30  EXPR. MODE    Controls the EXPression MODE   0=off
                  setting                        1=RATE
                                                 2=DEPTH
                                                 3=GLIDE
                                                 4=SEQ LENGTH
                                                 5=EXT. CLOCK
31  PLAY MODE     Controls the PLAY MODE         0=LOOP
                  setting. Whenever this         1=1-SHOT
                  setting changes, the digit     2=STEP-THRU
                  display flashes the new mode.
33  Encoder MODE  Directly sets the Encoder MODE 0=GLide
                                                 1=DIRection
                                                 2=Seq Length
                                                 3=DEPTH
                                                 4=Preset
34  PLAY FSW      Engages PLAY function. In      0=stop
                  Step-Thru mode both 0 and 127  127=start
                  advance the sequence.
35  RESET FSW     RESET FSW press                127=RESET FSW press
36  TAP FSW       TAP FSW press                  127=TAP FSW press
37  TAP DIVIDE    TAP DIVIDE Button press        127=TAP DIVIDE press
    BUTTON
39  EXP. MODE BTN EXP. MODE Button press         127=EXP. MODE press
40  ENC. MODE BTN ENCODER MODE Button press      127=MODE press
41  Seq. Step     When the sequencer is stopped  1…8 directly chooses
                  or if PLAY MODE is set to      the sequencer step
                  Step-Thru, this CC forces the
                  sequencer to jump to a step
                  immediately. If the sequencer
                  is running, this CC is ignored
117 Save Preset   Save current 8-STEP settings   0…99= immediately
                  to preset number specified in  save to preset
                  data field of this CC message. number equal to
                  If the data value is above 99, value of CC
                  the CC message is ignored.
118 Load Preset   Load or cue preset. Preset     0…99= load preset
                  number is specified in the     number equal to
                  data field of this CC message. value of CC.
                  If the data value is above 99, 100…127= unload
                  the 8-STEP unloads the current preset
                  preset.

MIDI PROGRAM CHANGE MESSAGES
Presets saved within the 8-STEP can be loaded using an external MIDI
device through MIDI Program Change messages. The MIDI PC messages
must be set to the same channel as the 8-STEP or set the 8-STEP to
accept all channels. Please Note: This manual describes PC messages
as having a range of 0 to 127; some devices use the range 1 to 128.
The total range is the same; you may need to adjust the PC number
by 1.

PC#  FUNCTION
0-99 Loads preset associated with the Program Change number. For
     example, Program Change 6 will load preset number 6.
100  PLAY FSW press
101  RESET FSW press
102  TAP FSW press
103  TAP DIVIDE BUTTON press
104  EXPression MODE BUTTON press
105  Preset Down Load – If no preset is loaded, loads the current
     preset number, otherwise decrements the preset number and loads
     the preset.
106  Preset Up Load – If no preset is loaded, loads the current
     preset number, otherwise increments the preset number and loads
     the preset.
107  MODE BUTTON press
108  Encoder Down - Equivalent to rotating the encoder
     counter-clockwise by one click.
109  Encoder up - Equivalent to rotating the encoder clockwise by one
     click.
110  Preset Load – Loads the current preset number.
111  Preset Un-Load – Unloads the current preset.
112  External CV Clock enable toggle – each time this PC message is
     received External CV Clock mode is enabled/disabled.